Last Friday saw a couple of cracking games take place at my brothers. The first was a Nuts! game which saw a patrol of British clashing with a patrol of Fallschirmjaeger and the second was a Check Your 6! scenario plucked out of my newly acquired copy of 'Over the Channel' (a scenario and campaign book from the publishers of the rules).
On patrol with Tommy and Jerry
First up was the Nuts! game. This was the first time that either Carl or James had played Nuts!, so I just officiated. It's also the first time James has ever played a skirmish level game, and probably the first time Carl has since we played WH40K in the dim and distant past. The table was prepared with plenty of hedges and walls for cover and a single hovel in the middle. Both sides had orders to send out a patrol and check the area out, so they were just going to 'bump' into each other. Carl sent his Tommies straight towards the building while James split his squad and approached frontally with his star leading the MG-34 team and a couple of riflemen, while his Cpl led the rest around the flank.


This led to a flanking shot at the advancing British from the NCO's MP-40 which sent them scurrying back to cover. The rest of the game was a bit strange as both sides concentrated their forces around the building and a straight up fire-fight began. The Germans already had the upper hand, though, with some Tommies ducked back from the SMG fire, so there was only ever going to be one outcome - grenades! James' Cpl readied his grenade and bravely charged forward to lob it over the hedge, stunning his victims. He promptly charged forward and dispatched a poor soul with his knife - those Fallschirmjaeger are a dastardly bunch!


However, revenge was taken as Carl's Bren team managed to set up and hose bullet's in the German's direction, killing him outright! The game was up, though! More 'potato-mashers' began landing amongst the British troops and soon enough the casualties began to mount and their morale waver, such that Carl conceded the game and the British section was captured by the enemy patrol.
Come fly with me...!
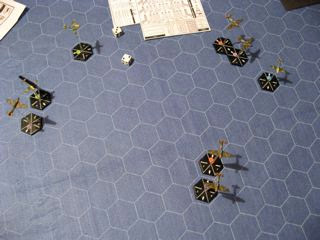
The next game took the fight into the air with a pure fighter based scenario set during the Battle of Britain. As we'd all played CY6! before, I didn't need to umpire so we all played. James had a
schwarm of 4 Bf-109s (led by an ace - the scenario is based on Adolf Galland, I think) which were bouncing two flights of 3 Hurricanes.
Phase1 - Although the Luftwaffe were outnumbered 6:4 they had the tactical advantage of starting above and behind and at faster speeds so the game started very quickly. James' lead aircraft had a pass at us, but fortunately missed with everything and the 2 Hurricane flights split right and left. James' lead
rotte tailed Carl's flight, while his second scythed across the first's path, causing the ace pilot to rely on his cat-like reactions and avoid a collision. I imagine that there would be a dressing down if they both survived the mission!
Phase 2 - The second phase of the engagement saw Carl ducking and weaving like a madman to avoid the guns of the enemy, and true enough, James just could not get a good enough firing solution to hit anything. I split my flight, sending my Vet and Green pilots after James' lead
rotte, leaving my Skilled pilot to bravely engage his two other fighters on his own. A very well timed and unsuspected Immelman saw my pilot loop over and appear on the left quarter of one of the 109s at point blank range. The burst of rounds resulted in black smoke streaming from the German fighter, which duly twisted and dived away. This let my other two Hurricanes slip away from that tussle and set off after the fighters that were chasing Carl down.

Phase 3 - End game! Carl's acrobatics had inevitably cost him altitude in order to retain speed, which had dragged James lead rotte down with them. This let my two planes get the advantage and with a spectacular long range shot, the ace pilot's wingman was shot down in a single burst. At the same time, his other two planes were actually on the defensive against the lone Skilled Hurricane! It didn't look too good for the Luftwaffe at this point. One pilot was downed and one was struggling with engine damage. It was time for the Ace to act and he finally managed to get a tailing shot against Carl's Hurricanes as they bottomed out at TAL 1. The fearsome cannon claimed their first victim of the engagement and the trailing Green Hurricane of Carl's flight fell out of the sky and into the Channel. But in his concentration, the Ace neglected to watch out for my Hurricanes who pounced from above and amazingly it was my Green pilot who landed the telling shot, causing the Ace's engine to smoke. The game was up! James conceded defeat and we left it there. His Ace probably was going to end up in the drink and his other two would probably manage to fight their way home! VP wise it was an RAF victory, but if James first pass at us had been better, then who knows how this might have panned out.


https://www.ichafaaizah.com/2020/08/asuransi-mobil-murah.html
ReplyDelete