About Me

My photo
I'm a bit of a born-again wargamer! I played many of the Games Workshop games when I was in my teens and early twenties, but left the hobby behind when I went to University. Over the last few years I have gradually got back into it and am literally having a ball! I'll play pretty much anything now, ranging from ancient historical to the far future! I think that I get more out of the painting side of things than actually playing, but that might just be because I get more opportunity. Hence the title...this blog is all about the colour of war!!

Wednesday, 5 January 2011

Wargames in a box

First off.. Happy New Year! Right, now that's out the way onto the gaming! :)

My first buy of 2011 was a semi-impulse purchase of Battle Cry (an American Civil War version of the Commands and Colours game system). I noticed it at a local comic/toy shop and thought 'oooh...should I buy that?'! I left it, though, and went home. At that point I decided I did want it so went back the next day and got it. It's no secret that I like games that are easy and quick to set up (and by that I mean assembling and painting figures and terrain) which is one of the main reasons I like Commands and Colours Ancients (CC:A), so Battle Cry seemed like a reasonable addition to the collection. In particular, I like the portability of the CC games which are, literally, wargames in a box! Most people's initial impression of the CC games is probably that it's a board game, but it really isn't. The system was designed for miniatures but for some reason it's produced as a board game rather that a paper rule set with various supplements.

So, with CC:Napoleonics pretty much on everyone's radar at the moment I thought I'd do a quick comparison of Battle Cry (BC) with CC:A. The box I got was the 150th Anniversary of the Civil War edition which is not, I believe, just a reprint, but includes some tweaks and all the scenarios from the original game plus supplements, so that's a meaty 30 scenarios in all compared to 15 in CC:A.

Contents/Price
First off, the actual production of BC is nothing short of lavish. The board is good quality and sturdy, the cards are nice and glossy as is the rule book (which contains the scenarios). The hex terrain tiles and various counters are all made from heavy card and the plastic figures are nicely detailed. The box comes with a plastic tray insert with compartments for all the various tiles, cards, dice, tokens and figures which is very appreciated. Contrast that with CC:A which came with no tray which means all the terrain tiles, cards, dice and blocks are all loose (all my blocks are segregated in zip-lock freezer bags, which I thought absolutely necessary if you want to set up a game in less than half an hour!). Finally, the dice in BC are properly engraved, nicely-sized dice and not just cubes you have to put stickers on. The dice in CC:A are my biggest bug-bear with the game...they're massive, clunky things!! Given that I picked up BC for £45 which is actually cheaper than I picked up CC:A for, then BC wins by a mile!


The Mechanics
The first section there is more of a comparison between different companies productions (Avalon Hill/Wizards of the Coast for BC and GMT Games for CC:A). The game mechanics themselves are very similar, unsurprisingly. However, BC is a actually a lot less complex than CC:A. In BC you have three troop types -infantry, artillery and cavalry. In CC:A there are also infantry and cavalry, but they are graded as Heavy, Medium and Light and that is what you are trying to throw against.
Also, in BC, the generals are a lot less important and do not have a symbol on the dice. They simply allow a retreat to be ignored and allow activation of attached units on leadership cards (usually with an extra dice in combat). In CC:A they have all those benefits plus a distinct effect on combat with leader symbols on the dice hitting for any units attached or adjacent.
Next is the major difference in the games - firepower, of course! In CC:A, light infantry can fire a couple of hexes (three for bows) and generally do little damage, as only unit symbols and flags count. In BC, infantry get 4 dice and lose 1 for each hex past the first to the target (so 4 at a unit in adjacent hex, 1 at one 4 hexes away). Artillery get 5. Cavalry get 3 but must be adjacent to attack (at first I was surprised at cavalry having to be adjacent as it felt like melee but they weren't generally used in the mounted, sabre-wielding role, but you can rationalise the short range as representative of the smaller numbers in a regiment, plus the fact that a portion have to hold the horses).  So firepower degrades nicely over range. This feels pretty good.
Associated with the firepower is the lethality of attacks. With the absence of a leader symbol on the dice it means there is a face going spare and it has been filled with another infantry symbol. Given that crossed swords always hit in BC it means that, against infantry, every dice has a 50% chance of hitting. In CC:A there is only one symbol for each grading and swords only hit for Medium and above, so the light infantry are really there to harass and it's the Mediums and Heavies that are the killing machines. The addition of a leader means you can achieve a 50% for each dice, but on the whole it's easier to get hits in BC than in CC:A.


Gameplay
I always thought that CC:A is a very simple game that you can teach a new player in minutes (and I mean that!), so I was interested to see just how an even simpler version would play as well as the obvious difference in warfare. I have to say I was not disappointed! In CC:A it's very much about getting your battle lines organised and into the enemy. Victory flags are mostly won through getting light troops behind targets and getting the heavies into the fight as soon as possible. BC felt completely different. Getting close to the enemy, especially one in terrain or dug in, is suicidal unless you're very confident of winning in one go, and artillery can really close off avenues of attack. I found that troops were generally moving into terrain a lot more (and the scenarios tend to have a lot more terrain, understandably) and blasting away at each other until the opportunity for a bayonet charge presented itself. So terrain becomes incredibly important, infantry are much more lethal, but are in turn killed a lot more easily. Throw in trenches and earthworks and all the flavour of the ACW is there!


Conclusion
Commands and Colours as a game system is simply brilliant! The same easy mechanics, with some simple tweaks, can satisfactorily (at least for me) represent warfare as widely different as Rome going head to head with Carthage and the ACW, which is really the first glimpse at modern warfare! As mentioned, CC:N is grabbing all the headlines at the moment, but I would heartily recommend Battle Cry to anyone as a fun, easy and quick game that really does play like a miniatures game and captures the flavour of the period. Of course, ditto to CC:A! It sort of feels like I'm criticising CC:A here, but I'm really not. I still love that game and would probably love Memoir '44 and CC:N if I ever got them! However, I have Napoleonic and WWII minis so I can get my fix that way. CC:A and BC really do fill a hole in my gaming spectrum, though, which is another reason why I'd urge people to consider them...they're a really cheap and accessible way of getting into period you don't currently have the minis for!

Friday, 31 December 2010

History nearly repeats itself

Corunna, 1809

Last night I enjoyed the last game of 2010 and a very good one it was. Having furiously painted hundreds of 6mm Baccus figures over the last couple of months we were all set to play the Corunna scenario from the Polemos Napoleonic Companion using Polemos General De Division rules. Carl took the part of Sir John Moore and I was Soult. James and I then split the French divisions between us with myself taking the right and James the left. The deployment was a curving line of British with Fraser (all trained) on the far right, then Baird and Hope (both veteran divisions) completing the line, with Paget (trained) somewhat in reserve and in position to plug the gap between Baird and Fraser. The French right was taken by Lorges and Delaborde, with Merle in the middle. James' command was Mermet beside Merle and Lahoussaye and Franceschi completing the cavalry left flank. All the French were rated as trained.

Looking from the British right / French left. I didn't have time to paint the general figures, so I just painted the bases red and blue and wrote the name and drew the NATO troop type symbol on them. Worked just fine!
The first few turns saw Delaborde and Lorges occupy the village Piedralonga to their front. Merle was to advance to Elvina (the big town in the middle) and Mermet to San Cristobal (nearest in the picture above). Our plan was to move the left cavalry divisions up to pin Fraser in place and move Merle up to keep Baird occupied while Mermet hooked around San Cristobal and into Baird's flank, or Paget if he moved up.

Merle and Mermet move off

Merle approaches Baird while Mermet moves through San Cristobal. The cavalry start to move up to occupy Fraser's attention.

The situation in the centre develops.
So far the French artillery was harrassing the British lines causing the occasional shaken result, but Carl always had his generals and C-in-C on hand to rally them. It was around this point that history nearly repeated itself when Moore was struck while the battalion he was with was under artillery fire. However, the dice gods favoured the British in this battle and Moore only suffered a flesh wound rather than a mortal one. So now the stage was set for the action to start. Mermet's approach towards the joint between Baird and Paget was causing Carl some concern, so he moved Paget up to plug the gap, as I had hoped he would do. I fancied the chances of Merle against Paget's trained troops more than Baird's veterans! So far Carl had been winning the initiative every turn because he could afford to bid almost all his tempo points as he was largely static, but he got a bit comfortable with always going first and his face was an absolute picture when I outbid him for the first time to grab the initiative and gave James the tempo point to get Mermet into Paget before he could respond. Alas, we had made our first mistake a couple of turns earlier, though. Merle deployed his division into mixed order and blocked off one of Mermet's brigades and we decided to just leave it there as reserve while the other two attacked Paget.

Mistake! One of Mermet's brigades is left behind!
And crisis point was acheived! Mermet's two brigades cried 'Vive l'empereur!" and charged! One of Paget's battalions was shaken and fell back into the rear brigade shaking them, but crucially the right hand brigade received a devastating volley and the head of the column disintegrated and the whole brigade fell back in disarray. Unfortunately for us, James rolled badly for the morale and the French troops decided that they weren't really that up for this fight! A wee bit like the real battle! :) However, this did leave the victorious French brigade to attack the flank of the battalion that had sent their counterparts reeling and another initiative win let us do just that! The brigade charged in and this time the British broke and fled. Crucially, though, the stalwart British brigades passed every morale check required and the division survived to regroup.

Mermet attacks and breaks Paget's formation up, but one French brigade is repelled and subsequently retires.

Mermet's victorious brigade follows up, breaks a battalion but Paget retires in good order and reforms. Further up Merle has advanced towards Baird.
As displayed above, while all this was going on, Merle advanced towards Baird, Lorges was menacing Hope and the two cavalry divisions on the left were making sure Fraser was going nowhere! At this point it was all in the balance. Paget was battered and driven back, but not broken. Mermet had lost a brigade but had one in a very advantagous position. We decided that Paget was not the best target so Mermet wheeled his brigade to attack Baird's flank and try to coordinate with Merle.


Mermet wheels into Baird's flank and Merle lets off a volley to try and shake the British with some success.
 But, as I said, the dice gods favoured the British that night! Mermet's brigade charged in but were halted by a murderous volley from the British and had to fall back, one battalion fleeing. This left them vulnerable to a countercharge by Paget which broke the whole brigade (again James failed every morale roll) and Mermet decided his division could do no more and retired from the field.

Paget sees off Mermet!
Baird took this moment to call his veteran division into action and charge home against Mermet. The French musketry was nowhere near as effective, but the division survived the attack but not without plenty of shaken levels and falling back. I managed to clear some shaken levels with Soult and Merle moving up personally and then counterattacked with the flanking brigades in column. The British volleys were telling though and the French had to fall back again. We had already established that the French weren't up to the fight and I duly failed a morale check and one brigade was spent. Time was running out at this point and the British were looking very strong still having only had one battalion broken for four French brigades! So we called it a day and a resounding British victory.

I think that the scenario as a whole is a pretty difficult one for the French to win as half the Brirish army is rated as veteran which makes them a very tough nut to crack without overwhelming numerical superiority which the French don't really have. I already mentioned our first mistake, which was leaving one brigade back which could have been decisive had it been in the attack, but I think we made another which was to not use the left flank cavalry a bit better. I think that one division would have been sufficient to prevent Fraser getting too involved and perhaps we could have comitted Lahoussaye into a combined attack against Paget with Mermet. I think that would have resulted in total destruction of Paget's division, but then...hindsight is 20/20!! As it stands, it was a fun enjoyable battle that could have gone either way at one point, but it generally went with history and the stout British thwarted what I think was a reasonable plan, just executed by an unenthusiastic French corps. Now...if only Napoleon hadn't buggered off back to Paris!!!

Monday, 20 December 2010

A year of blogging

I know, it's been ages, but I've not really had much to blog about! November was a very quiet month for gaming with the snow and everything and I have pretty much only been painting 6mm Napoleonic figures for a big game just before New Year (we're going to use the Polemos rules to play the Corunna scenario from the companion volume). I toyed with the idea of doing a step-by-step to illustrate just how easy it is to get a nice result but I just didn't get the time. Too many bases to get through in a reasonably short time (well, for someone with 2 young children, anyway!). However, I'm nearly there and that means I can start looking at what projects are looming in 2011.

First off, my brother is getting me some Gladiators for xmas and I can't wait to get my hands on them and start painting 28mm figures again! The 6mm stuff is nice and fast and the mass effect is lovely, but the actual painting of individual figures is nowhere near as rewarding as 28mm. Plus I have a copy of Morituri Te Salutant that I have read and am itching to try out. I'm a big fan of games like MTS that are quick to play, yet tactical, and only need a few figures and minimal terrain as it allows you to add variety to the games available quickly and cheaply. I think that's certainly a major factor in why I like CY6! Once you have the mat and stands, all you need are a handful of planes for whatever period you want.

Secondly, the zombies are coming to get you!! :) Having recently watched the Walking Dead I was inspired to get All Things Zombie and a bunch of Rebel Minis 15mm zombies, so I'm just waiting for them to arrive from the US. Not only do I think that this game will be a lot of fun, but it's perfect for solo play and it will be very suitable for the Friday games with James and Carl, as we can play coop, rather than versus. With only 3 players a coop game will be ideal.

Thirdly, the club usually puts on a Hordes of the Things tournament early each year, so I took some time to plan my army for that and acquire the figures, so I'll need to paint them soon. I won't say what they are yet...you'll have to wait and see!

Lastly, there are a couple of anniversaries coming up that hold some interest for me. First is Crete in May, which we have already seen some figures for, but not much else! Second is Albuera which is a Napoleonic battle that always fascinated me. It's one of the few major battles that Wellington didn't command at and it also is one of the few that the Spanish gave a credible performance at. Also, it was the first appearance of the Vistula Lancers in a major battle (or so I believe), soon to be the Lancers of the Imperial Guard, and I always had a wee thing for their uniforms! :)

So, in short, next year looks to be a colourful one and I do hope to get some photos of the Corunna game and maybe some shots of the armies before the New Year. So until then...!

Wednesday, 3 November 2010

The Battle ends as the Blitz begins

Last night saw the final instalment of the Battle of Britain campaign I've been running at the club. The first Tuesday of the month is traditionally given over to a multiplayer campaign game in which all club members are free to turn up and participate and, as it is the 70th anniversary of the Battle of Britain it seemed a good time to run a Check Your 6! campaign. The campaign lasted 5 months from July to November, covered the major stages of the battle and had 17 players in one game at its peak. I think all the players had a good time and there were some memorable dogfights.

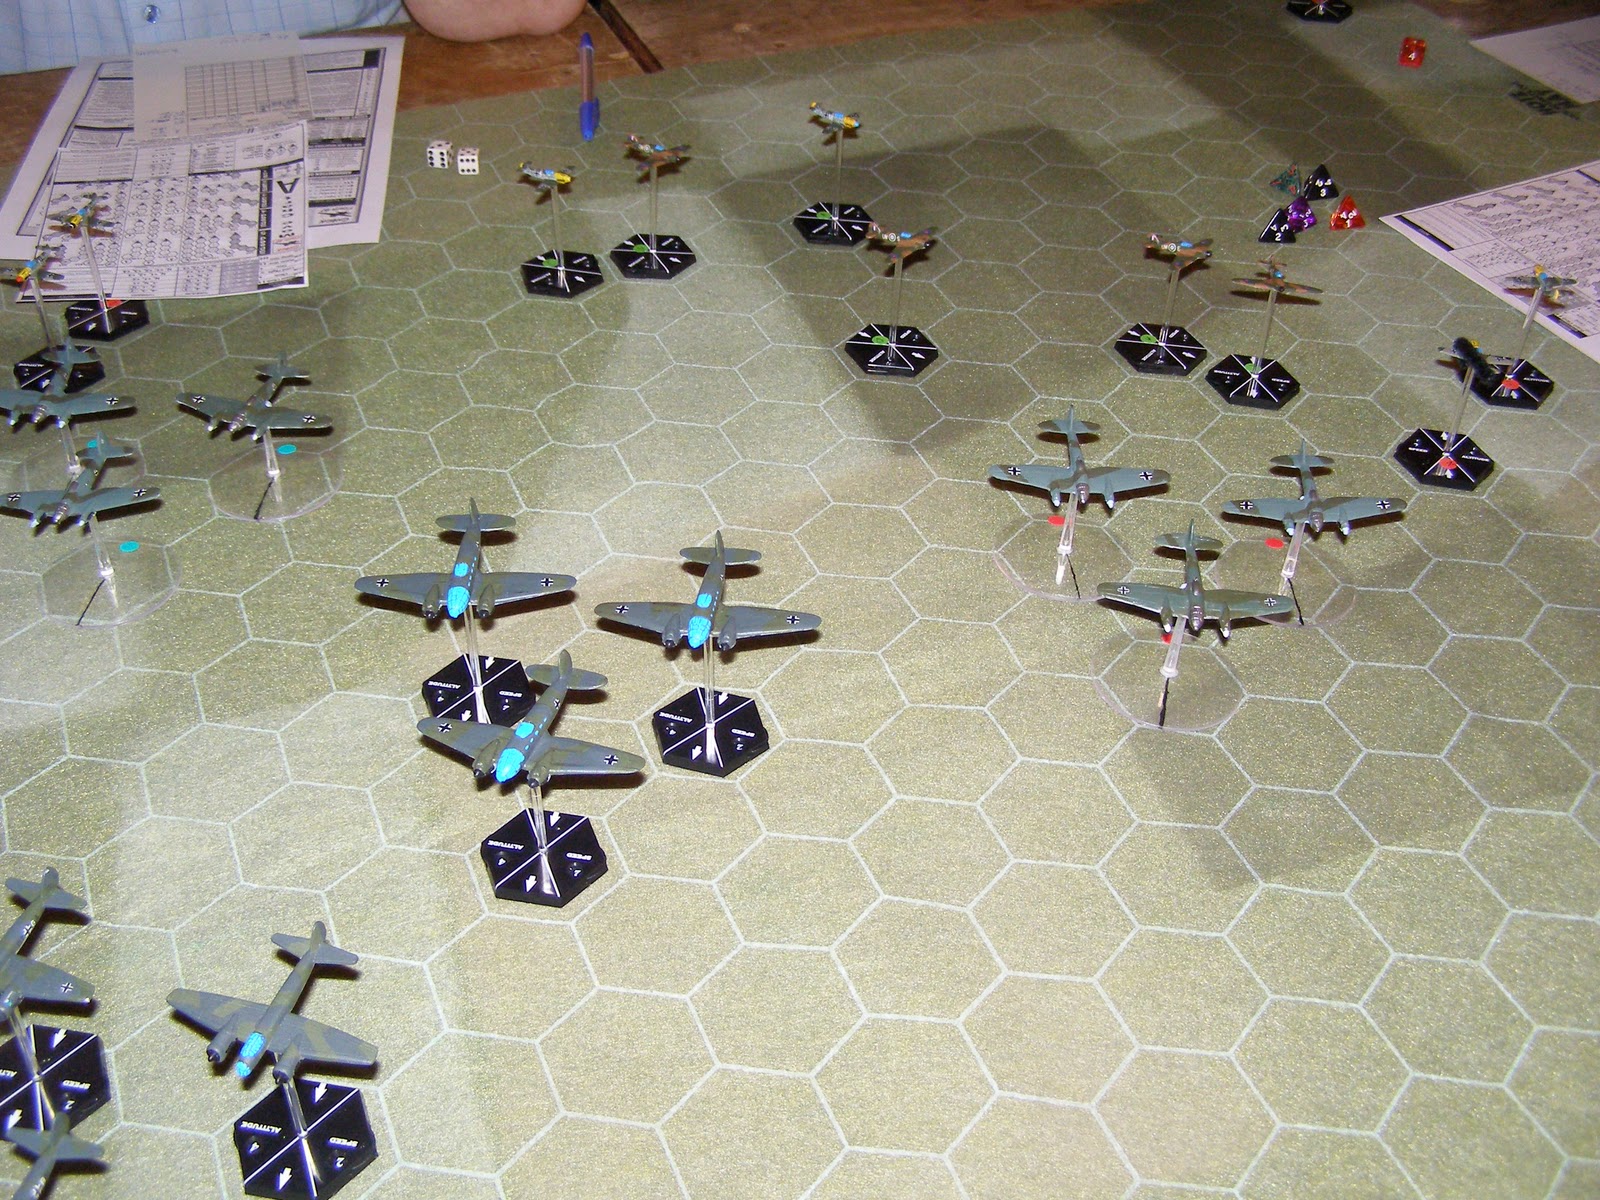
Although I didn't blog all the game reports I felt that the last one was deserving if for no other reason than the sheer number of aircraft on the table. For the start of the Blitz we managed to gather a mighty armada of 15 Heinkel He-111s and 6 Junkers Ju-88s being escorted by 8 Bf-109s grouped into rottes (2 planes). The RAF mustered 2 flights of 4 Hurricanes each and one of 4 Spitfires. The bombers were placed on table and then the players were invited to place their flights one after another alternating from German to British (or I should say Allied...we mustn't forget the Poles, Czechs, Commonwealth  and all the other pilots that gave everything and without them...well...who knows!). This lead to a very fluid situation from the outset with the RAF mingling with the Luftwaffe from the very start, which is what I desired due to the numbers of planes on table. Even a couple of turns of maneouvring would have eaten up time. I'll not give an accurate description of the game as I pretty much can't! With that many planes it's almost impossible to keep track of everything so I'll let the pictures tell the story (with the help of some captions!) :


The inital positions. You can see the RAF are mostly bouncing the bomber formation from behind.


The RAF make their first pass at the bombers as the fighter escort tries to get into position to make their kills.

Closer view of the action. A Heinkel has suffered engine damage  and has turned for home.

On the other side the fighter escort has tangled with the RAF allowing the bombers to slip away. There are two opposing aces in this dogfight and they each really wanted to chalk up the other as a victory!

More and more bombers suffer damage and are forced to ditch their bombs and turn for home, but RAF casualties are mounting.

A large portion of bombers have got away as the dogfight develops. A plucky green pilot sets off after them in his damaged Hurricane. Despite getting hit another couple of times his airframe avoids any more damage and he would damage 2 of the bombers forcing them to abandon their mission. This pilot was awarded the DFC.

The results of the game were 1 Heinkel shot down and 7 damaged for the loss of 4 RAF fighters and 1 damaged. One Bf-109 was shot down and another damaged. Two inexperienced Luftwaffe pilots were drawn too far into the enemy territory and would not make it back to France due to lack of fuel. So, all in it was an RAF victory, but not a big enough one to take the campaign which the Luftwaffe players shaded.

I had a good time running the campaign and coming up with the scenarios and I really hope that the players enjoyed the games and perhaps you enjoyed reading about them!

Wednesday, 27 October 2010

Trial by fire!

Fresh from it's shakedown cruise, Grossadmiral Smoke arrived on the battlecruiser KRS von Clausewitz with orders to take a battlegroup of ships and escort a small carrier group from a friendly NAC faction across hostile territory. Joining the battlecruiser was the heavy cruiser KRS Edelweiss, the light cruisers KRS Pirch and KRS Bulow, the heavy destroyer KRS Hohenzollern and the two heavy frigates KRS Lutzow and KRS Leichtenstein. The battlegroup was swiftly gathered and the calculations made for the jump to the rendezvous with the NAC carrier RNS Ark Royal and it's escort cruiser RNS Achilles.

On arrival, the long range sensors indicated no other vessels in the sector and the NSL ships awaited the arrival of their erstwhile allies. Soon the sensors picked up the energy signatures of the NAC ships as they jumped into the designated coordinates and the fleet began to align for the jump to the next waypoint. However, just before the command to spool up the FTL was given, the Grossadmiral was alerted to the sudden appearance of a hostile ESU fleet jumping almost on top of the battlegroup. There was no time to jump now. The ships would be too vulnerable to enemy fire while the calculations were made and the drives were prepared. All hands were piped to quarters and the ships ordered into battle formation. The von Clausewitz moved into a position to protect the Ark Royal and sent the Hohenzollern, Lutzow and Leichtenstein ahead to screen the capital ships. On the right of the line, the Edelweiss formed up with the Pirch and Bulow.
The enemy ESU fleet jumps in (this isn't their actual setup, though)

Battlegroup Smoke in formation
The two forces began to move towards each other and the ESU immediately began to split their fleet into two. An enemy carrier and battlecruiser were identified to the NSL right, supported by an escort cruiser, while several heavy cruisers, destroyers and frigates began an encircling motion to the left. After some minor manoeuvring the allied fleet held it's battle line as the long range fire began to probe shields and armour alike. As the gap between the two ESU groups got larger Grossadmiral Smoke sensed an opportunity. The battlegroup was ordered to fire thrusters and concentrate on the carrier group.

The ESU carrier launches it's fighters
A fierce exchange of fire began and the ESU fighter groups swarmed around the Edelweiss. Fortunately, swift action by the Achilles swatted many of the enemy craft from the void and the attack was dampened. As the range closed the Ark Royal launched her torpedo attack craft with orders to attack the two capital ships ahead. Meanwhile, heavy fire from the von Clausewitz and escorts destroyed a frigate providing close support  for the carrier. The second ESU group swung about into the von Clausewitz's group and returned fire, destroying the Leichtenstein. Undeterred, the von Clausewitz continued to swing around to attack the carrier while the fighters pressed their attack. A huge volley of beam fire and torpedoes struck the carrier and in a flash of brilliance it's core was breached and the enormous hull vaporised with all hands lost. This allowed the Edelweiss to bring it's beams to bear on the opposing battlecruiser and a lucky strike smashed the bridge killing the nerve centre of the ship, leaving it to drift at the mercy of the allied fleet.

The carrier is gone and the battlecruiser is crippled.

At this point the Grossadmiral ordered full thrust to be applied and the von Clausewitz and escorts set off after the crippled battlecruiser, while the Edelweiss was to swing around to tackle the oncoming ESU cruisers.  As the Ark Royal's fighters returned to their bays and began rearming, the ESU commanders realised that the game was up and loosed a last volley before spooling up their FTL. The full force of fire struck the rear of the von Clausewitz and many systems were damaged. Reports indicated that nothing was critically damaged, though, and as the ESU ships blinked off the sensor displays, Grossadmiral Smoke was left with the task of organising the capture of the enemy battlecruiser, limping the von Clausewitz back to space dock and informing the families of those lost on the Leichtenstein.

The ESU prepare to jump as the Edelweiss comes around and the Ark Royal prepares to launch again.

Sunday, 24 October 2010

Oooh, shiny!

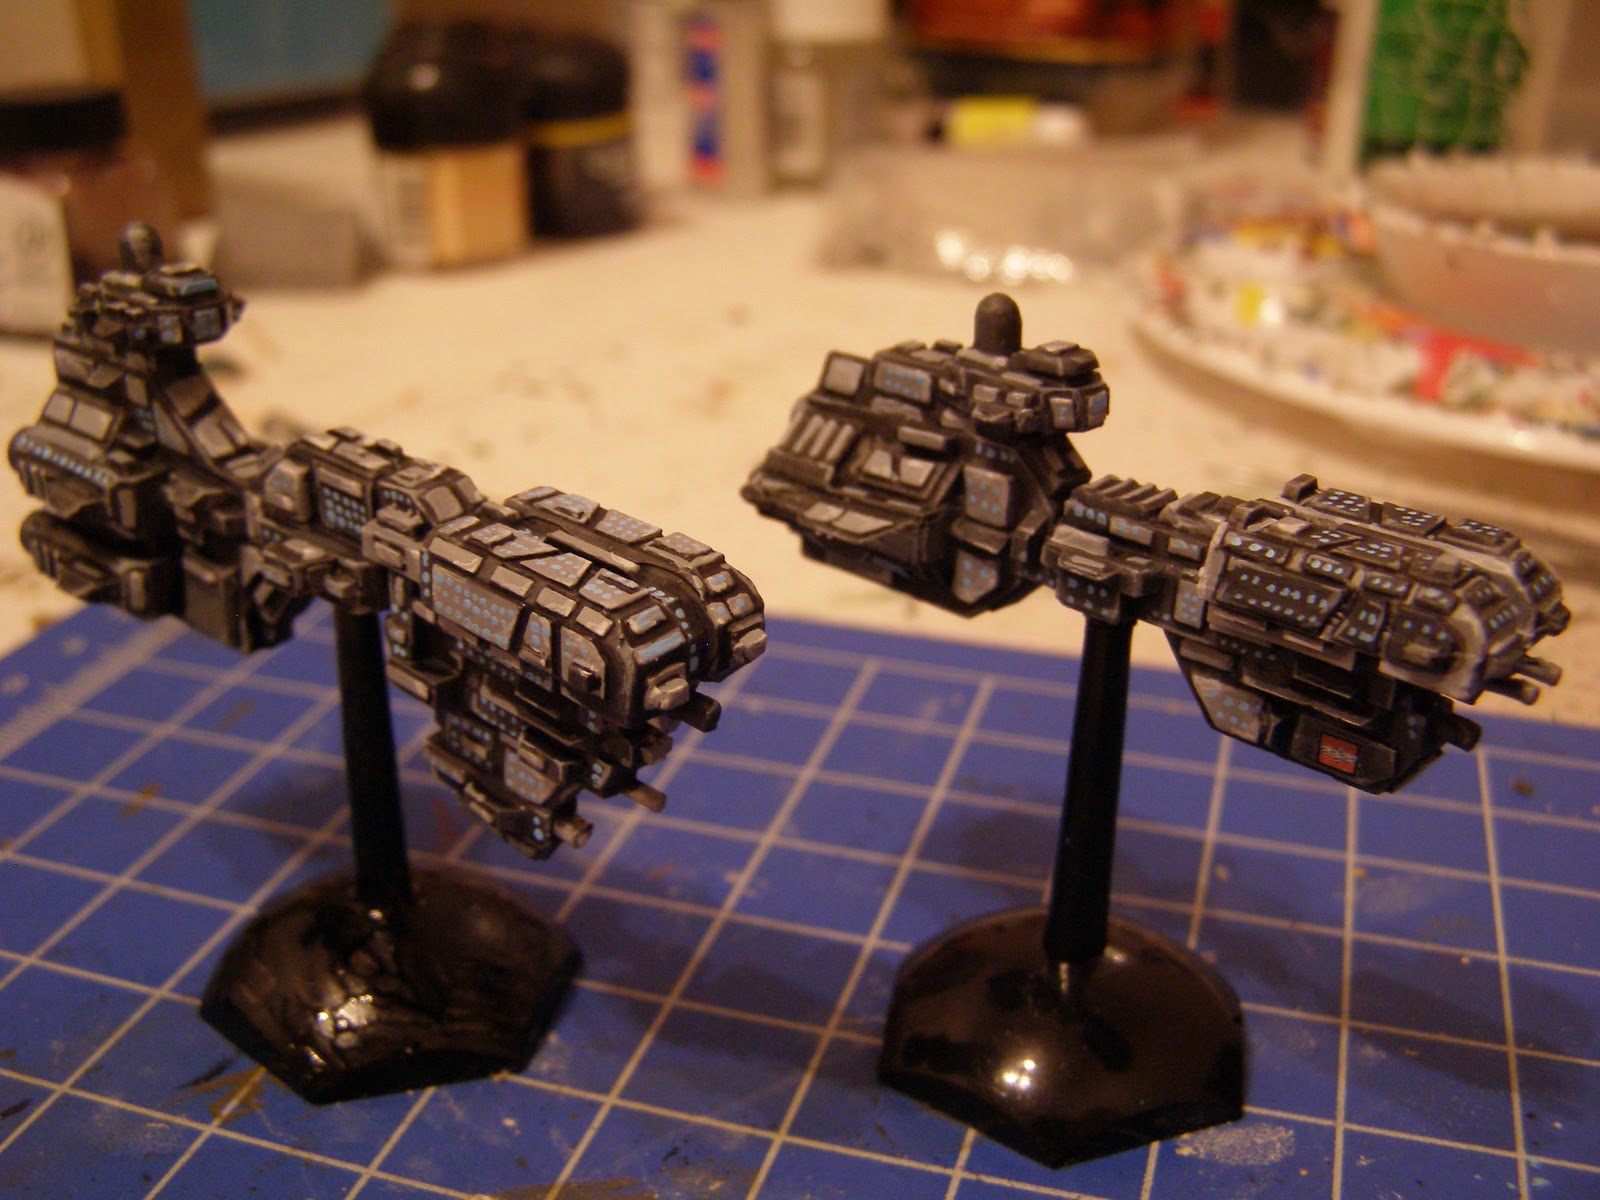
I have to admit that I'm a bit subject to the 'oooh, shiny' syndrome and this post is testament to that. I do still intend to grind on with painting the Romans and Seleucids, but I realised a week or so ago that I really need a good idea of an OOB or particular force to maintain momentum. I just don't have that with the ancients at the moment. I guess the best idea would be to work out what I need for the basic starter FOG army, but it'll be a while before I get both sides completed. In the meantime, I've decided to dust off the 6mm Napoleonics and get them finished so that Carl, James and I can do a refight of Corunna when we're off over Christmas. Well...they've only been sitting in my cupboard for about a year and a half!! But, before I get totally involved with that, though, I needed to finish off the Full Thrust fleet which was actually quite enjoyable despite my general dislike of painting vehicles. So here's a few shots of them before they get their first outing at the club on Tuesday. Naturally the fresh paint will be a laser magnet and I fully expect them to be space debris before too long! :)


Monday, 11 October 2010

All quiet on the blog front!

I find that, sometimes, I get a bit burnt out with painting and just can't get on with it. This seems to happen more often after I've been racing through the figures trying to get them done in time for some project or particular game. Most of September was like that, especially after I came back from holiday. But I'm starting to get a bit of momentum back now, thank goodness. Unfortunately, like many other gamers, I also can't help but get distracted by that shiny new army or project! I really need to stay focussed and get the current project done before I move onto something else...but that pile of 6mm Napoleonics is looking very appealing at the moment! :)

So what's the current project? Well, I managed to get another Roman battlegroup for FoG or Armati or Impetus or Tactica II or whatever done, but the main effort is now directed at a Full Thrust starter fleet!! The evil ones at the club introduced me to this game which is a lot of fun and, like Check Your 6!, pretty cheap to get onto the table. A double starter fleet from Ground Zero Games only cost £25 for 8 ships a side...plenty to get started with. James has also agreed to paint one side (FSE) so that I can concentrate on the other (NSL) which means we have an excellent chance of getting a game in a couple of weeks. And so, without further ado we leap from ancient Rome to the far future...


Related Posts Plugin for WordPress, Blogger...